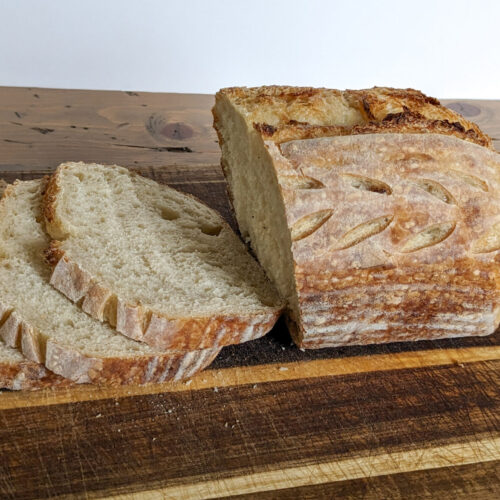
Traditional Artisan Sourdough Bread with All-Purpose Flour
A simple (easy to memorize), low hydration sourdough bread recipe that is easy to work with and beginner-friendly.
Equipment
- Mixing bowl with cover
- Kitchen Scale
- Banneton or bowl lined with parchment paper or cotton towel
- Bench Scraper (optional)
- Bread Lame or sharp knife
- Parchment Paper or silicone sling, for baking
- Dutch Oven or 2 loaf pans
Ingredients
- 325 grams water if using bread flour, can increase to 350
- 100 grams active sourdough starter
- 500 grams all-purpose flour unbleached
- 10 grams salt
Instructions
Mixing
- Weigh water into a medium size bowl. Add starter and mix roughly to break the starter up.
- Add in flour and salt. Mix together until no dry bits remain. Cover for 30 minutes.
Stretch and Folds
- After 30 minutes, perform a series of stretch and folds. With wet hands, grab up one side of the dough, stretch it up and pull it across the dough. Rotate bowl and repeat, until you have come back to where you started. See post above for photos.Cover for another 30 minutes.
- After 30 minutes, repeat the same process. You will do this for a total of 4 times, waiting 30 minutes between.This is important: the dough will start to be become more smooth and elastic, then will "tighten" up by the last set or two.DO NOT tear the dough. Only stretch it as far as it will go before resisting. You are building the strength of the gluten here, and you don't want to damage it by tearing it.
Bulk Rise
- When you have done 4 sets of stretch and folds, cover the dough and let rise. This is the most difficult part to master: the bulk rise.You want it to rise until the dough has puffed up, jiggles when you shake the bowl, and has bubbles on the surface and sides.This could be anywhere from 2-12 (yes, seriously) hours, depending on the temperature of the room.
Shaping + Cold Ferment
- Bench rest: When the bulk rise is over, dump the dough out and form it into a snug ball. Be careful not to tear the dough. (see above for details). Let sit for 20-30 minutes to allow the dough to relax again.After the dough has relaxed, flip the ball onto its back and shape it.There are many ways to shape. The most simple is to fold both sides to the center, then roll it up. This is adding more tension and structure to the dough.Place in a well-floured banneton, seam-side up.Cover with a towel and place in the fridge for 12-24 hours.The longer you leave it, the more sour it will become.
Baking
- Before baking, preheat your oven to 450°. If using a dutch oven, put it in the oven when you turn it on and allow it to heat for 30 minutes after your oven reaches temperature. When the oven is ready, take your banneton out of the fridge and flip your dough onto a piece of parchment paper.Score (or cut) a line running down the length of the dough (see post for more tips and details). This allows the dough to expand during baking.
- Bake for 30 minutes with the dough covered.Then remove the cover and bake for another 10-15 minutes, until browned to your liking.Let cool before slicing.